Operator-focused video outline based on the active Studio A configuration, the plugin
directory, and a clicked-through walkthrough of the running Podcart UI at
http://localhost:3000.
The browser opened http://localhost:3000 and the app redirected into /control/mixer.
Control API was available on :4000. The UI successfully loaded live layout from the configured drivers and plugins.
Recorder degraded
Recorder API was not listening on :8081 during the walkthrough. The browser console repeatedly logged recorder session fetch failures.
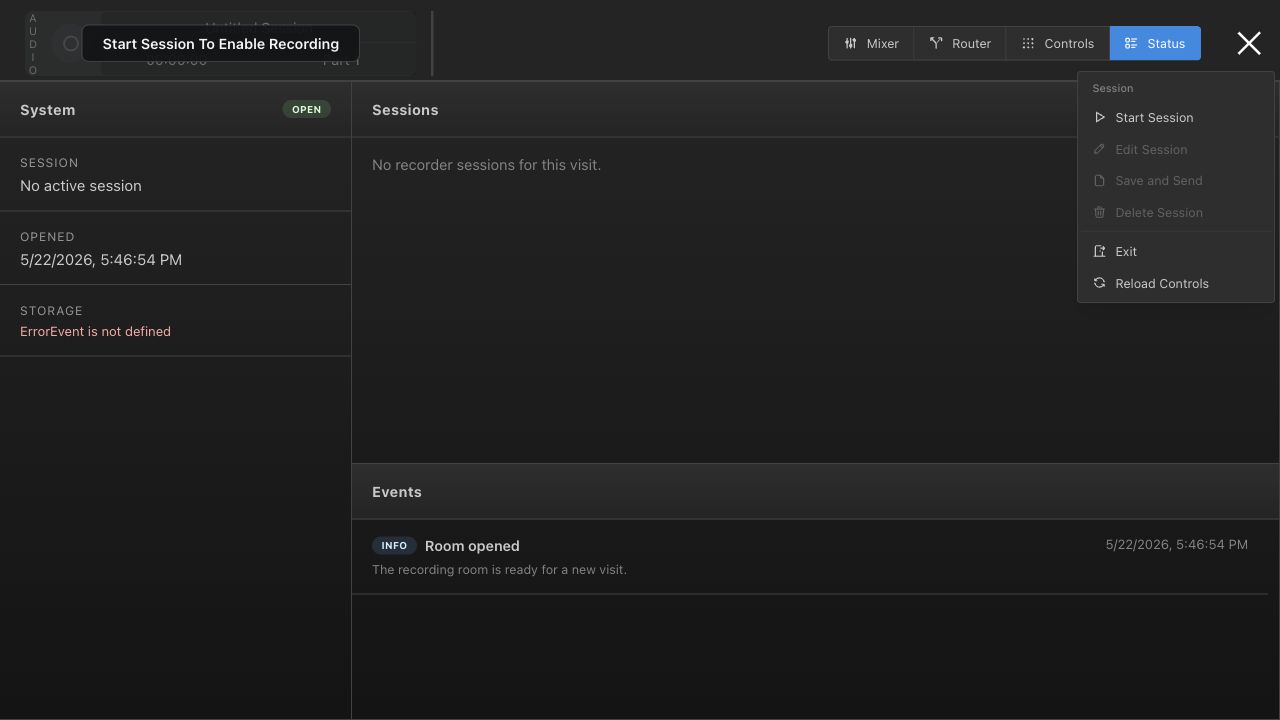
Status showed storage as ErrorEvent is not defined. Start recorder-api before filming any recording/session workflow.
Configured room
The active config is Studio A with mixer channels 1-9 and 11 mapped to waveform channels, plus router, camera, lighting, display, ATEM, X32, and recorder/session surfaces.
Filming advice: For tonight, film the operational UI. Avoid pressing live hardware-changing controls unless the room is safe for it: router Take, TV Off, Lyntec Sequence OFF, ATEM CUT/AUTO, camera reset baseline, and recording-mode recall all perform real actions.
Videos To Make Tonight
Highest priority
1. Start, Record, Stop, Save Session
This is the first training video operators will need. Show how a visit becomes an active
recording session, where the timer and part count live, and how a finished session is
finalized.
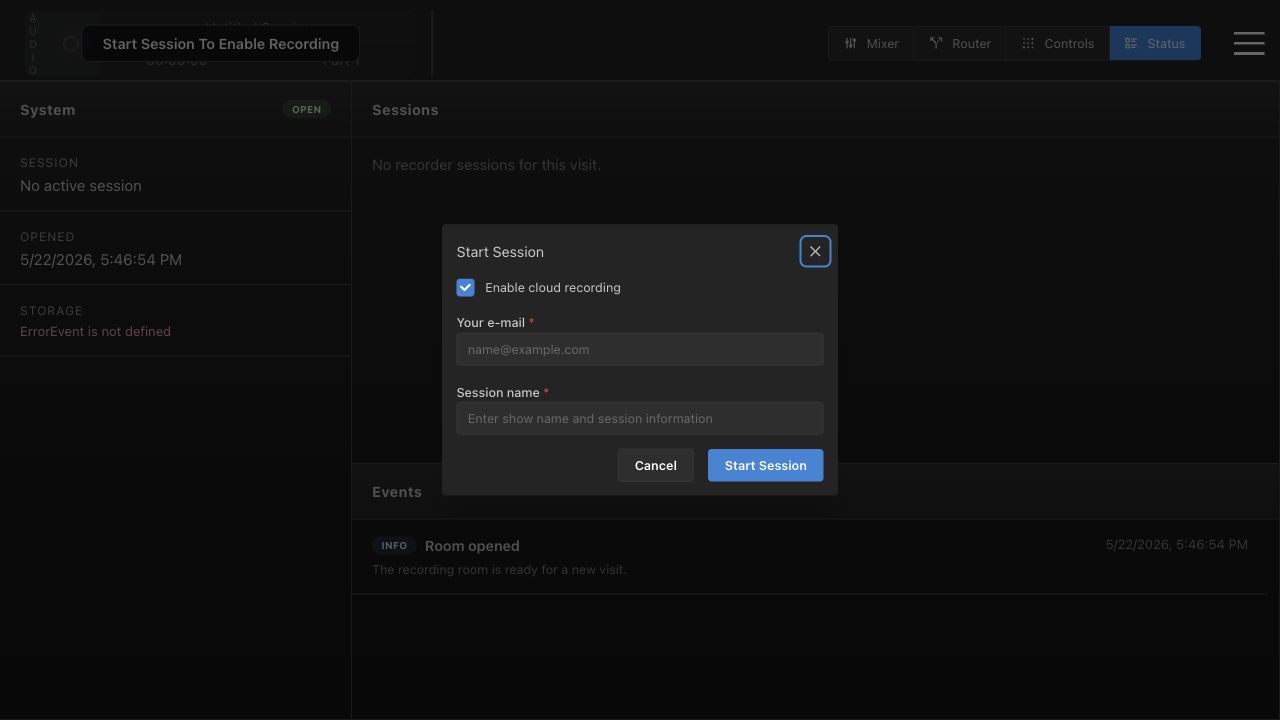
Open the session menu, choose Start Session, and explain cloud recording.
Show required email and session name fields.
Explain the top-left record button, timer, session name, and Part number.
Show the difference between Save and Send, Delete Session, Exit, and Reload Controls.
Film this only after recorder-api is running so the Status page does not look broken.
Session menu: operator actions before and after recording.Start Session modal: cloud toggle, email, and session name.Recording strip is visible above every main workflow.
Highest priority
2. Mixer Basics
Cover the main audio view that opens by default. Keep the explanation practical:
which channels operators should recognize, what faders change, and how this relates to
the recording strip.
Show Mic 1 through Mic 8, Zoom, and Video.
Explain that the top strip stays visible while navigating.
Point out that the record button stays disabled until a session is active.
Mixer default screen with faders and disabled recording controls.
Highest priority
3. Full Video Router
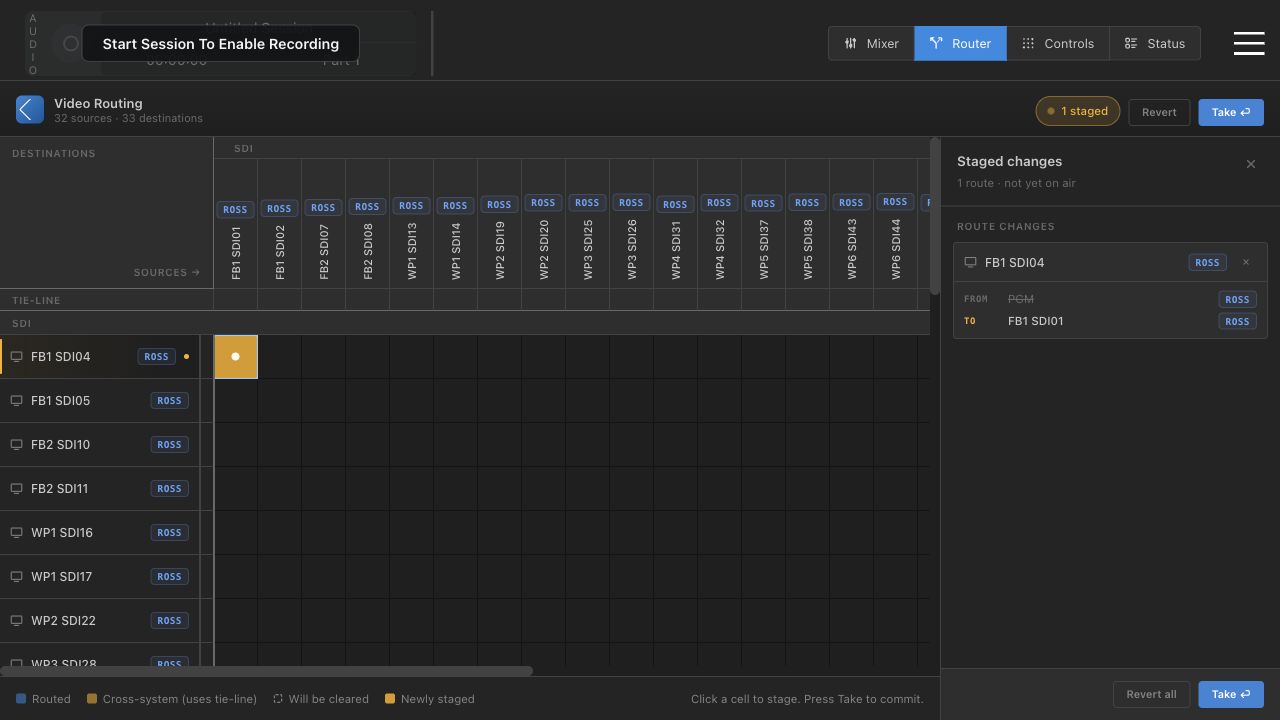
The router has the most potential for operator mistakes, so make the staging model very
clear. A matrix click does not go on air immediately; it creates a staged route.
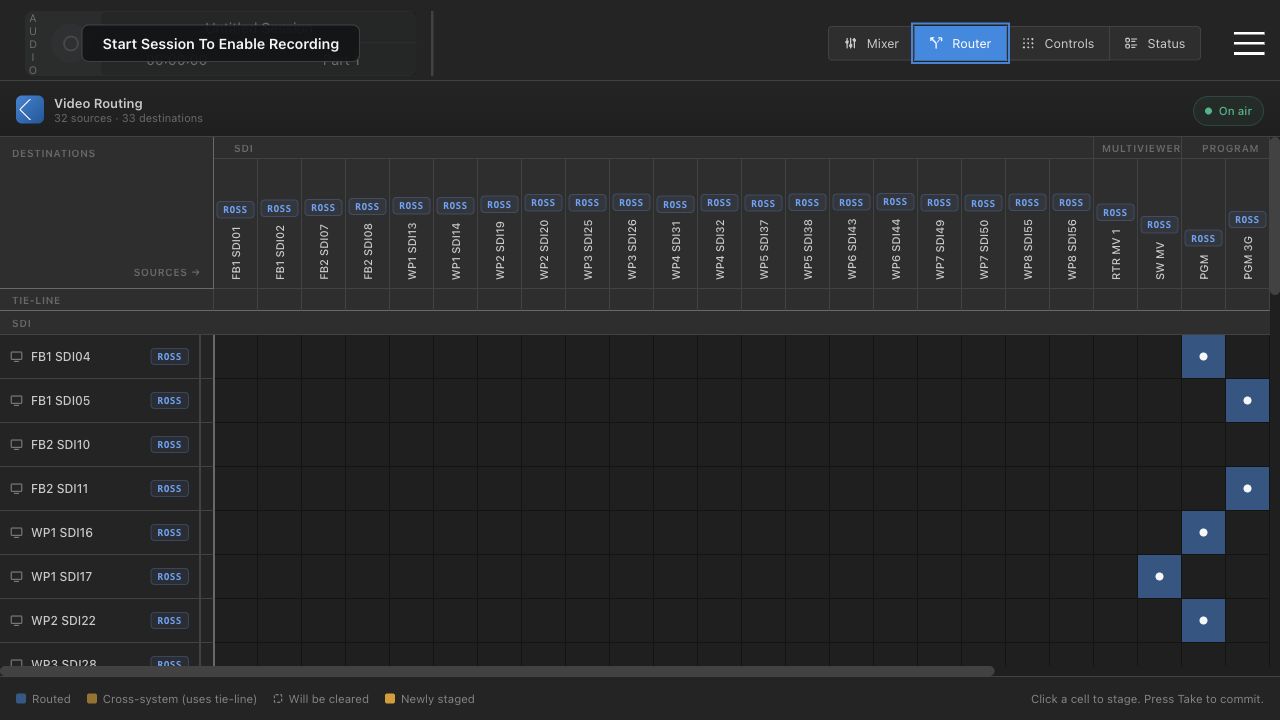
Show 32 sources and 33 destinations, with source groups and destination groups.
Explain blue routed cells, yellow staged cells, and the On air indicator.
Stage a harmless route, show the staged drawer, then Revert.
Explain that Take commits all staged changes and should be deliberate.
Router matrix: current routes and grouped source/destination headers.Staged route drawer: Revert before Take if the change is wrong.
Highest priority
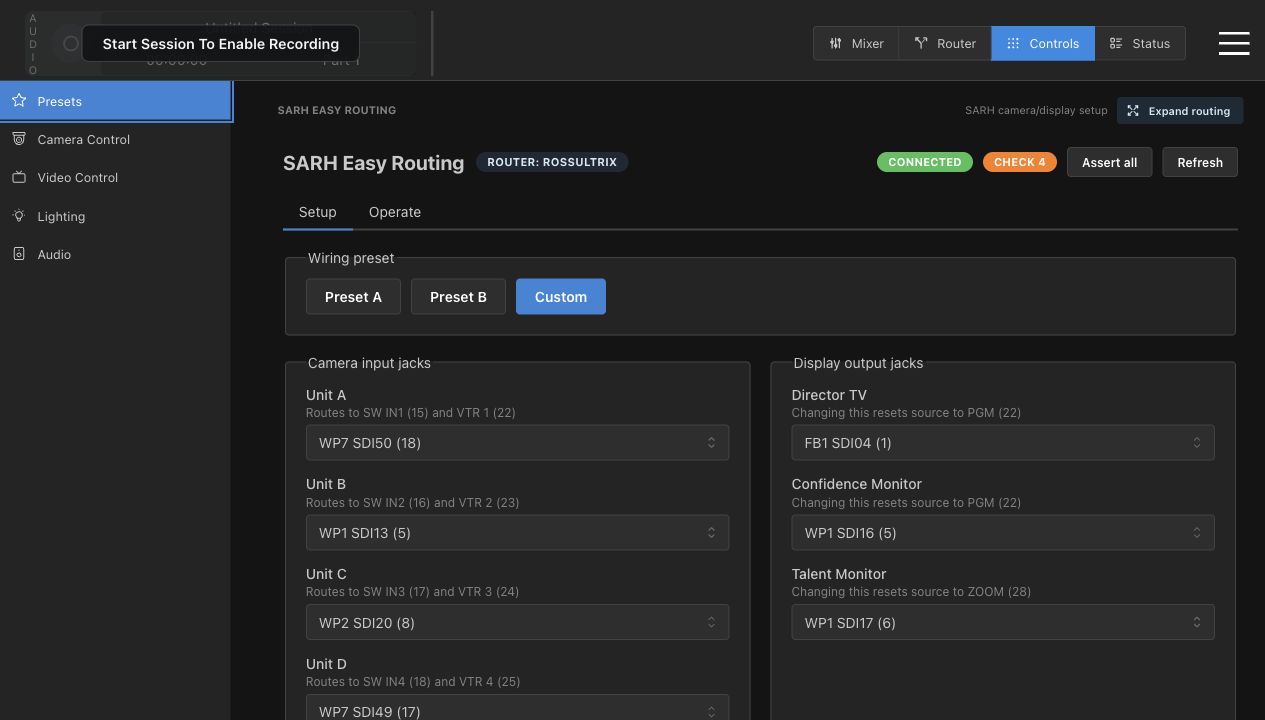
4. SARH Easy Routing
This is the operator-safe front door for common camera and display wiring. It should be a
separate video from the full matrix because the mental model is different.
Setup tab: Preset A, Preset B, Custom, camera input jacks, and display output jacks.
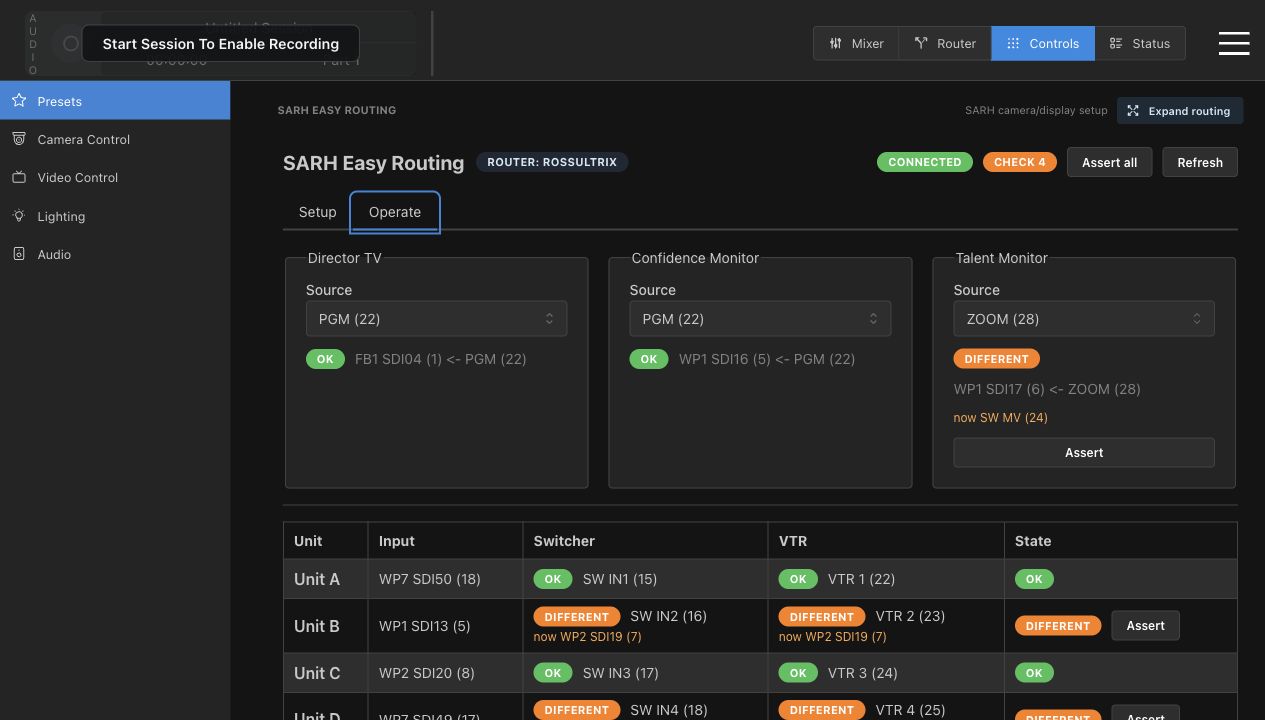
Operate tab: Director TV, Confidence Monitor, Talent Monitor, and unit route table.
Explain OK, Different, Check count, Assert, Assert all, and Refresh.
Current walkthrough showed Check 4, so include what a mismatch looks like.
Setup tab: wiring presets and jack assignments.Operate tab: OK vs Different with Assert actions.
Highest priority
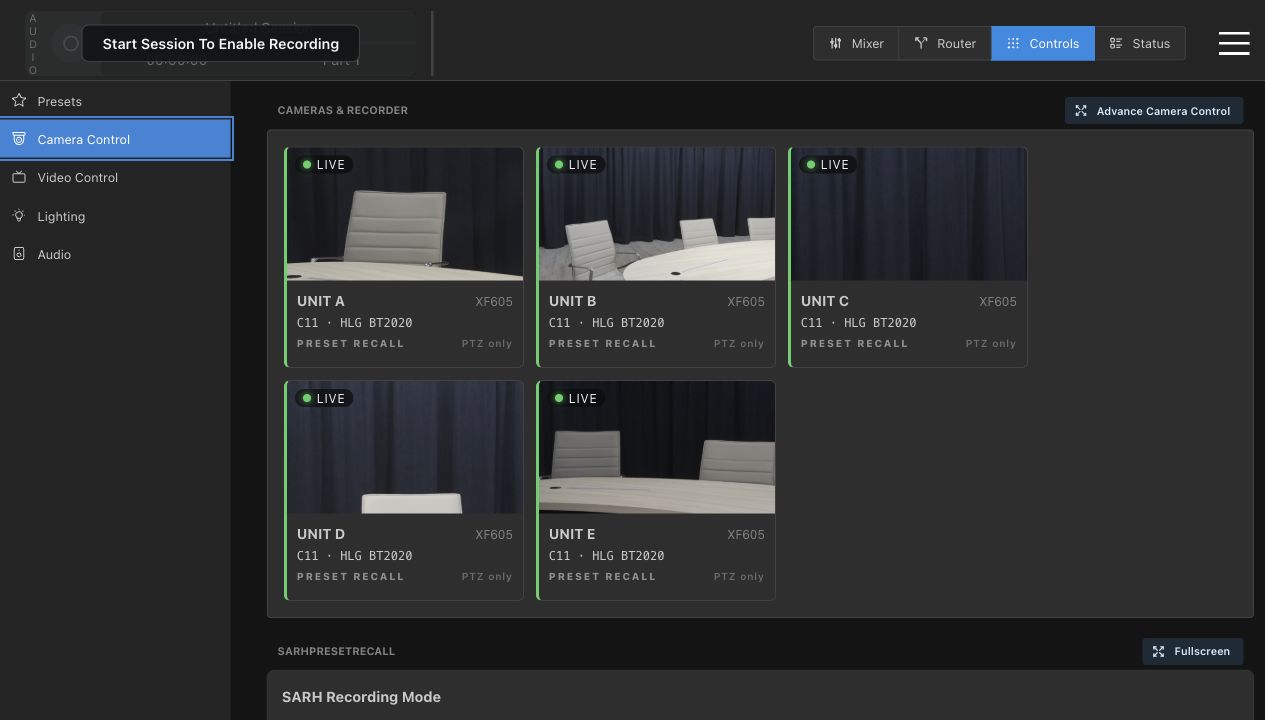
5. Camera Quick Control
This is the camera view most operators should use during normal setup. Keep the video
focused on choosing a unit, checking live state, and using PTZ/lens controls.
Show the five live cards: UNIT A through UNIT E.
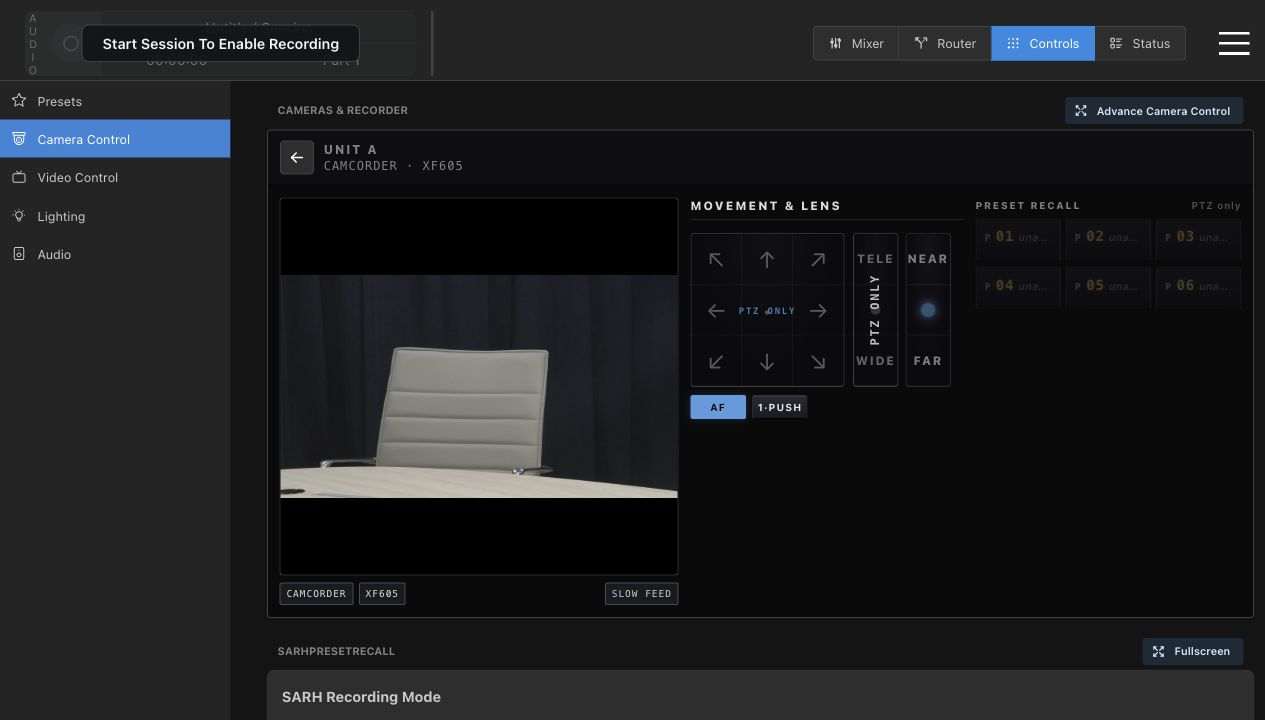
Open Unit A and show the detail view.
Explain PTZ pad, zoom, focus, AF, 1-PUSH, and slow feed.
Explain why preset slots may appear unavailable or PTZ only.
Camera cards: live preview, model, profile, and PTZ-only state.Unit detail view: PTZ, focus, and preset recall surface.
Important
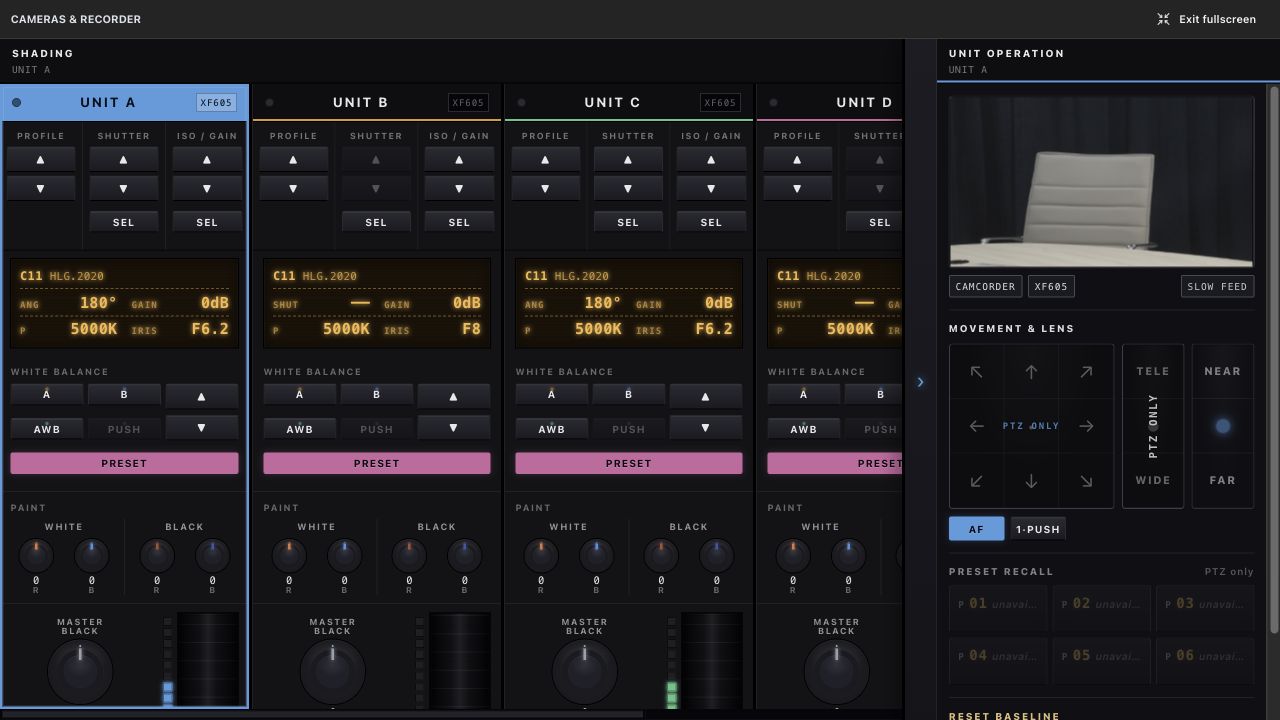
6. Advanced Camera and Shading View
This is for technical operators, not first-time users. It exposes deep camera state and
should be taught with clear guardrails.
Show Advance Camera Control fullscreen.
Explain per-camera columns: profile, shutter, ISO/gain, white balance, paint, master black, AE, and iris.
Show the Unit operation drawer on the right.
Warn that Reset C10 and Reset C11 overwrite camera baseline slots.
Advanced camera fullscreen: shading plus pinned unit operation drawer.
Important
7. Recording Mode Recall
This can be filmed from the Camera Control page. Operators need to know what Long Play
and High Quality mean before they touch recall buttons.
Long Play: cameras Rec709 SDI, C10, recorder H.265 High.
High Quality: cameras HLG 2020, C11, recorder ProRes HQ.
Explain that recall affects all configured cameras and recorder mode.
Avoid pressing recall unless the room is ready for a real mode change.
SARH Recording Mode card lives below the camera cards.
Important
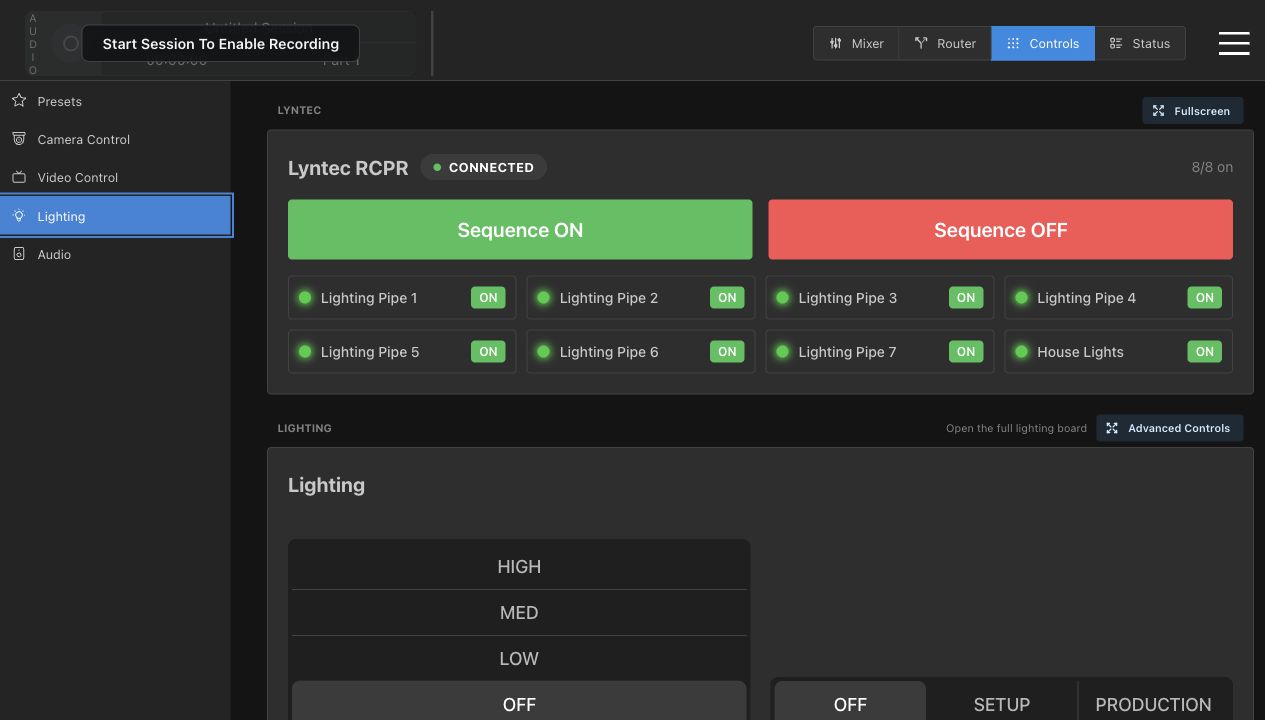
8. Lighting and Power
Split this into power safety first, lighting presets second. Operators should understand
that Lyntec controls physical circuits and MA3 controls lighting looks.
Lyntec: connected badge, 8/8 on, Sequence ON, Sequence OFF, individual circuits.
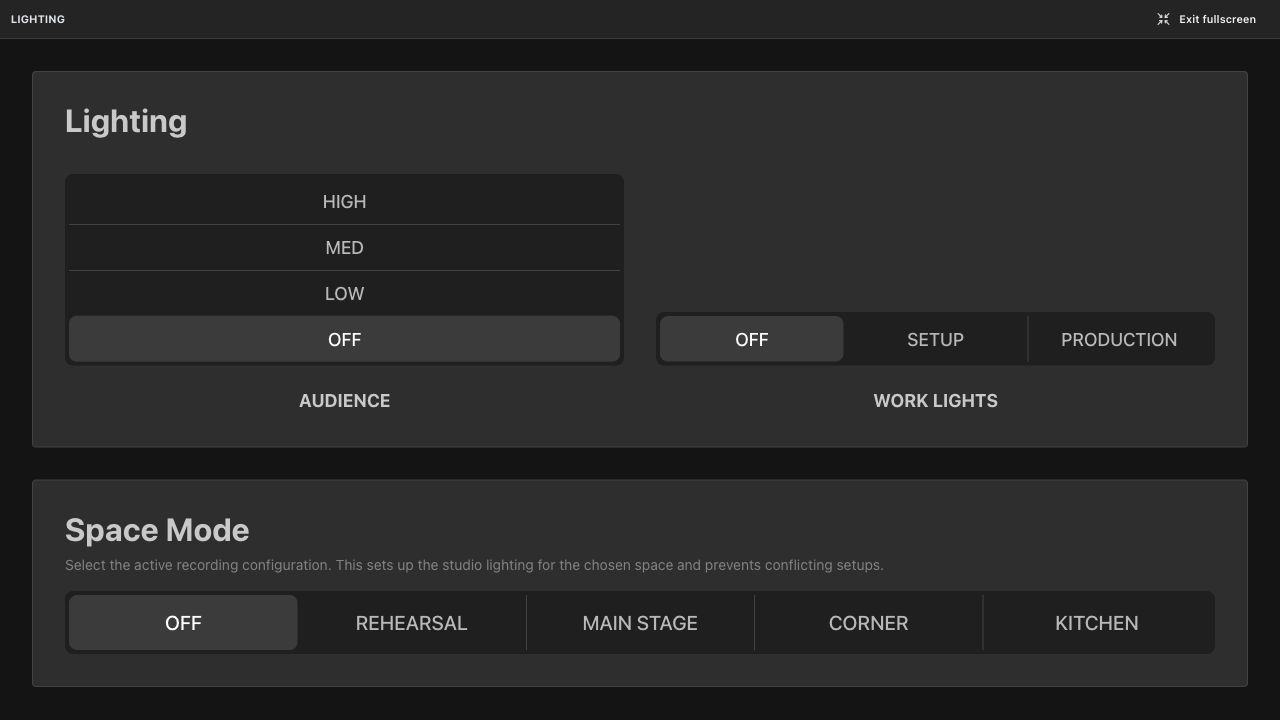
MA3 lighting: Audience, Work Lights, and Space Mode.
Use fullscreen view for a clean lighting-board shot.
Warn that Sequence OFF and individual OFF states affect real equipment power.
Lighting page: Lyntec circuits above lighting controls.Lighting fullscreen: Audience, Work Lights, and Space Mode.
Important
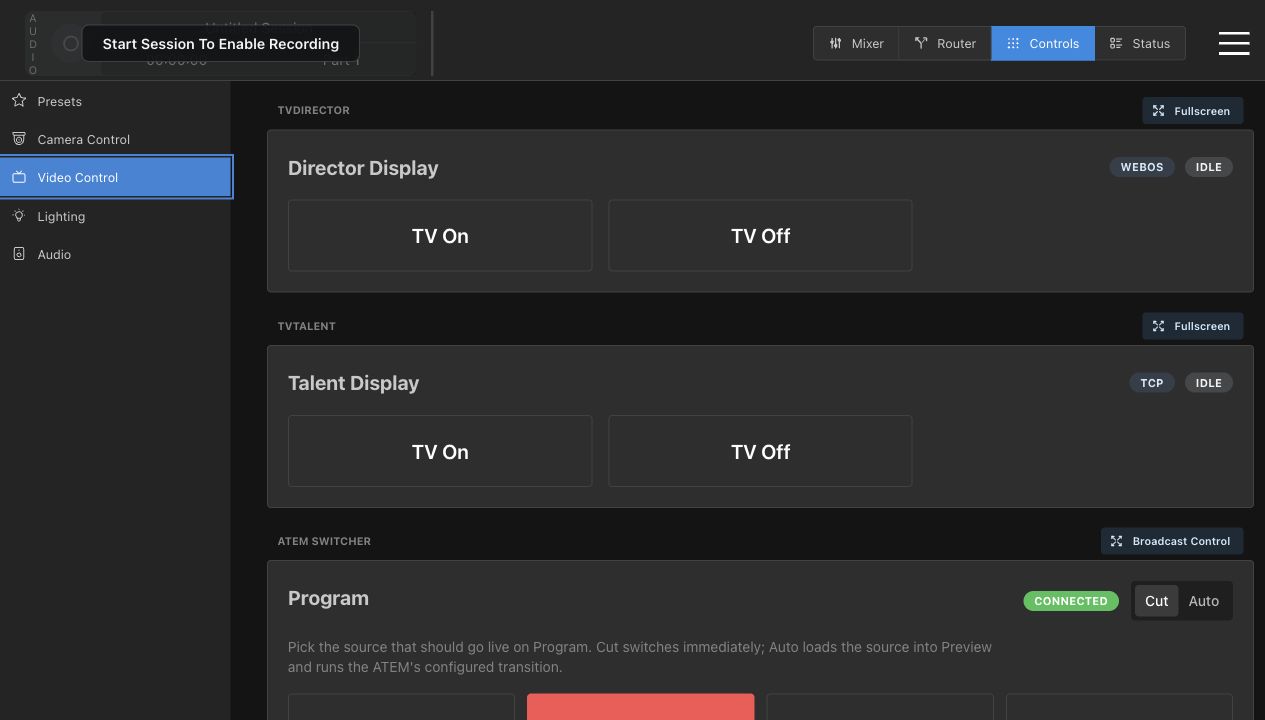
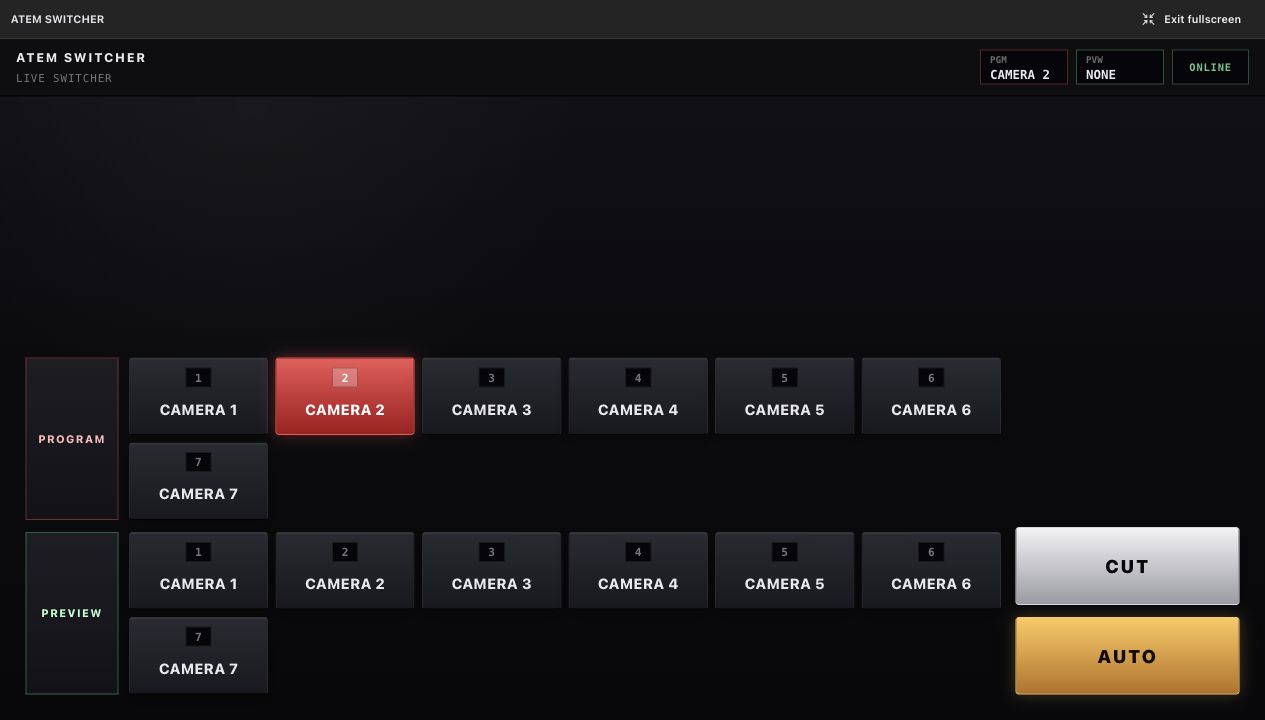
9. Video Control and ATEM
This should be framed as live broadcast control. Explain which controls are safe to look
at and which controls actively change Program or device power.
TV Director and Talent Display: TV On and TV Off.
ATEM Program card: Cut vs Auto and Camera buttons.
Broadcast Control fullscreen: Program bus, Preview bus, CUT, AUTO, online state.
Explain that Program buttons and CUT/AUTO are live switching actions.
Video Control: displays, ATEM program control, and autoswitch.ATEM fullscreen: Program bus, Preview bus, CUT, and AUTO.
Useful if time
10. Auto Camera Switching
Operators who run panel-style recordings need this, but it depends on understanding mics
and cameras first.
Show Mic 1 through Mic 5 mapped to Cam 1 through Cam 5.
Explain Enable, Sensitivity, Use default shot, and Default camera.
Explain the fallback camera when no single mic is clearly loudest.
Autoswitch controls live below the ATEM card on Video Control.
Useful if time
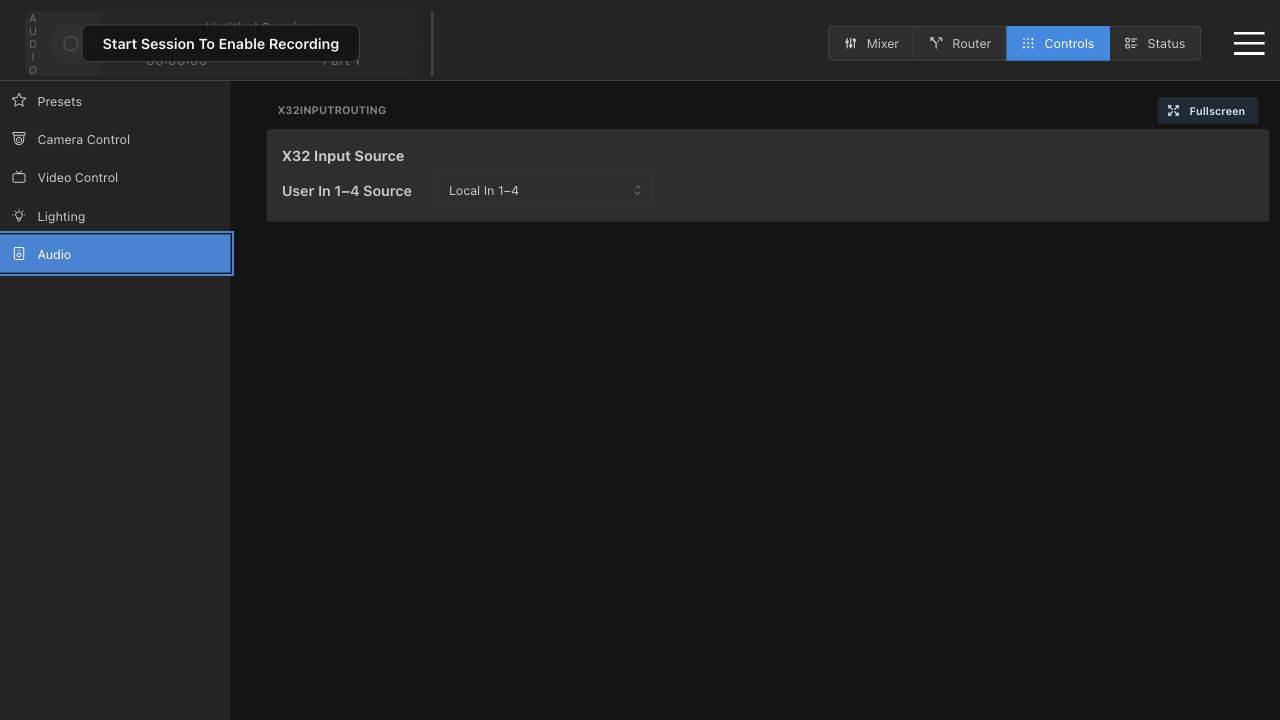
11. Audio Source Routing
This is a short but important utility video for troubleshooting input-source selection on
the X32.
Show X32 Input Source.
Explain Local In 1-4 vs Card 1-4.
Call out who is allowed to change this and when.
Audio controls: X32 User In 1-4 source dropdown.
Useful if time
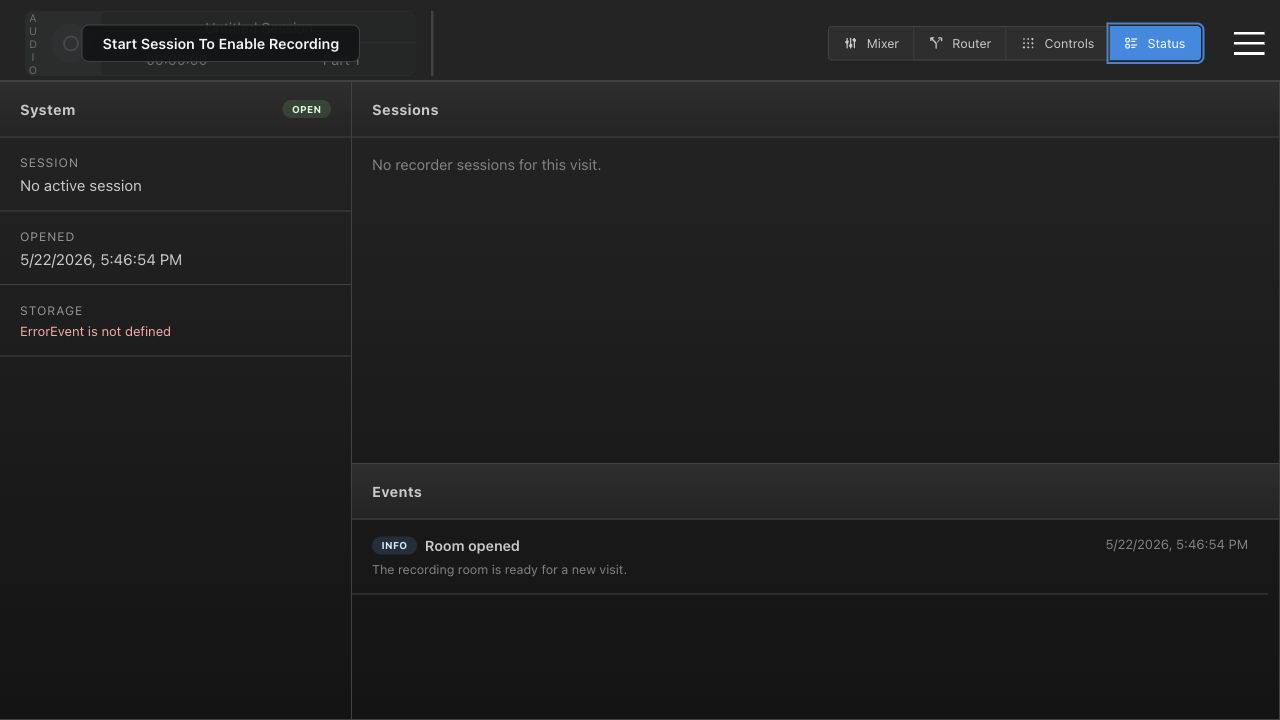
12. Status and Troubleshooting
This video helps operators report issues clearly. Refilm after recorder-api is healthy so
storage and sessions show the normal state.
Show System, Sessions, and Events.
Explain open, No active session, Room opened, and storage state.
Show how to identify recorder/session trouble from the Status page.
Status page from the walkthrough. Recorder was degraded here.
Suggested Filming Order
Order
Video
Why This Order
1
Start, Record, Stop, Save Session
Operators need this before any other feature matters. Make sure recorder-api is running first.
2
Mixer Basics
This is the default screen and establishes the top recording strip.
3
SARH Easy Routing
Safer and simpler than teaching the full matrix first.
4
Full Video Router
Teaches staging, Revert, and Take after the easy router model is clear.
5
Camera Quick Control
Practical setup workflow for normal operators.
6
Recording Mode Recall
Belongs near cameras because it changes camera profiles and recorder codec.
7
Lighting and Power
Needs explicit safety framing for physical circuits and real lights.
8
Video Control and ATEM
Live switching controls should be taught after routing basics.
9
Advanced Camera and Shading
Best for a technical-operator addendum.
10
Autoswitch, Audio Source Routing, Status
Short support videos once the main workflow is covered.
Skip Tonight
Unconfigured or test plugins
Do not make operator training for AMXVideoRouter, AtemVideoRouter,
SACNLightingDriver, VideoRouterUI, ShowOffPlugin,
TestPluginMantine, TestPluginNone, or TestPluginVanilla
unless they are enabled in the active config.
Headless backend details
MA3OscControl, RossUltrixRouter, and CanonXC matter,
but operators see them through SARH Lighting, Router, and Camera UI surfaces. Train the
visible UI first.
Plugin development internals
The plugin host, custom elements, state-server protocol, and iframe bridge are useful for
developer training, not tonight's operator video set.